Introduction
Ensuring the safety and quality of your well water is crucial for the well-being of your family and the environment. In this guide, we’ll take a journey through the process of testing well water, covering everything from understanding the basics to addressing contamination issues and implementing preventative measures.
Understanding Well Water
Understanding the intricacies of well water is crucial for maintaining a safe and reliable water supply. Let’s delve deeper into the basics and common contaminants associated with well water.
Basics of Well Water
Groundwater Sources
Well water primarily derives from underground sources, tapping into aquifers—permeable rock formations that store and transmit water. These aquifers act as natural filters, removing impurities as water percolates through layers of soil and rock. The depth of a well is determined by the distance to the water table, the upper surface of the groundwater.
Groundwater, unlike surface water from rivers or lakes, is less susceptible to immediate pollution, providing a generally cleaner water source. However, the potential for contamination exists, making regular testing and understanding the local geology essential.
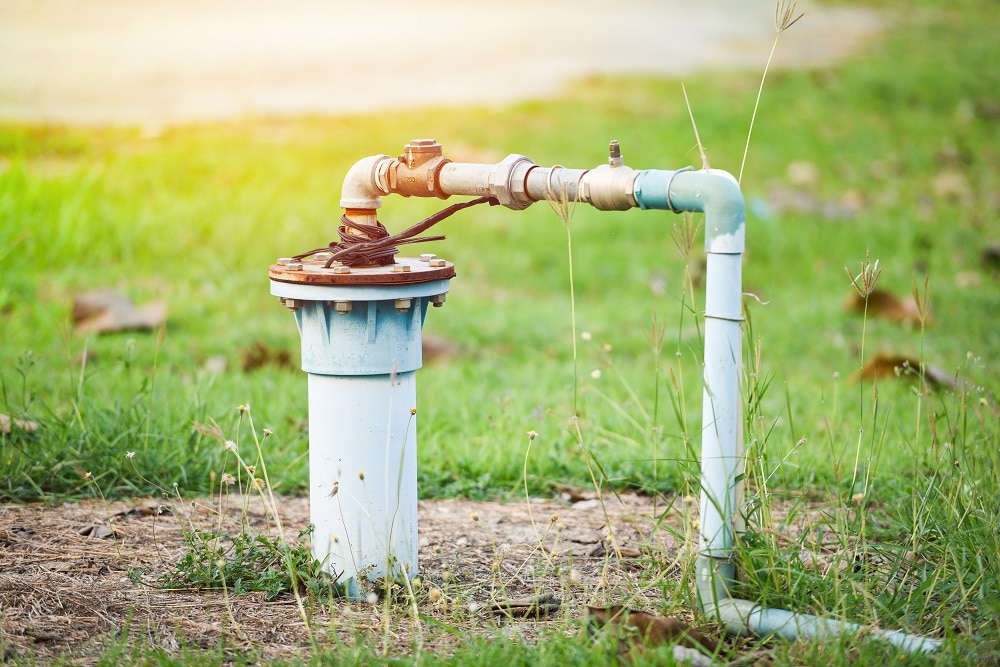
Well Components
A well consists of various components working together to extract and deliver water. Understanding these components is vital for maintaining water quality.
Casing: The well casing is a protective structure typically made of steel or plastic that lines the well hole. It prevents contaminants from entering the well and ensures the structural integrity of the well.
Screen: Placed within the casing, the screen allows water to flow into the well while preventing the entry of debris. It’s especially crucial in preventing sand or sediment from entering the water.
Pump: The pump is responsible for lifting water from the well and delivering it to the surface. Different types of pumps, such as submersible or jet pumps, are used depending on the well’s depth and water table.
Common Contaminants
Microorganisms
Microorganisms pose a significant threat to well water quality. Bacteria, viruses, and parasites can find their way into well water through various means, including septic system leakage, animal waste, or contaminated surface water infiltration. Common microorganisms include:
Coliform Bacteria: These bacteria indicate the potential presence of harmful microorganisms. E. coli, a specific coliform bacterium, is a key indicator of fecal contamination.
Viruses: Pathogenic viruses such as norovirus or rotavirus can cause waterborne illnesses and are often challenging to detect without specialized testing.
Parasites: Protozoa like Giardia lamblia and Cryptosporidium can contaminate well water, causing gastrointestinal illnesses.
Chemicals and Minerals
Chemicals and minerals can enter well water from natural sources or human activities. Understanding the common contaminants helps in selecting appropriate testing methods and implementing necessary remediation measures.
Arsenic: Often present in groundwater due to geological factors, arsenic is a toxic element that can cause serious health issues.
Nitrates: Agricultural activities and improper septic system maintenance can lead to elevated nitrate levels in well water, posing health risks, especially for infants.
Iron and Manganese: Naturally occurring in some geological formations, these minerals can affect water taste, appearance, and may stain plumbing fixtures.
Volatile Organic Compounds (VOCs): Industrial activities or improper disposal of chemicals can introduce VOCs into well water, potentially causing health concerns.
By comprehending these basics and being aware of common contaminants, well owners can make informed decisions about testing methods, maintenance practices, and necessary interventions to ensure the safety and quality of their well water.
Before delving into well water testing, conducting a comprehensive initial well inspection is crucial. This inspection involves visually assessing the well and reviewing historical data to identify potential issues.
Visual Inspection
Signs of Contamination
A visual inspection serves as the first line of defense in identifying signs of contamination that may impact the well water quality.
Discoloration: Observe the color of the water. Unusual colors, such as brown or cloudy water, can indicate the presence of contaminants like sediment or rust.
Odor: Detect any unusual smells in the water. Foul or chemical odors might suggest contamination from sources like bacteria or industrial pollutants.
Sediment or Debris: Inspect the water for visible particles or sediment. Excessive sediment could indicate issues with the well screen or surrounding aquifer.
Vegetation and Animal Activity: Check for the presence of plants or signs of burrowing animals near the wellhead. These can introduce contaminants into the well.
Structural Integrity
Ensuring the structural integrity of the well is vital for preventing contamination and maintaining long-term functionality.
Well Casing Condition: Inspect the well casing for any signs of corrosion, cracks, or damage. A compromised casing can allow contaminants to enter the well.
Well Cap and Seal: Verify the integrity of the well cap and seal. A properly sealed well prevents surface water, insects, and debris from entering the well.
Above-Ground Infrastructure: Assess the condition of above-ground components, such as the pump house or wellhead. Adequate protection from the elements ensures the longevity of these components.
Historical Data Review
Past Testing Results
Reviewing past well water testing results provides valuable insights into the historical water quality and any trends or changes over time.
Comparative Analysis: Compare current visual observations with historical testing results. Identifying deviations from the norm can signal potential issues.
Contaminant Trends: Track trends in specific contaminants over multiple testing periods. A consistent increase may indicate a developing problem.
Nearby Environmental Influences
Consider the environmental factors surrounding the well, as they can impact water quality.
Proximity to Potential Contaminant Sources: Identify and assess the distance between the well and potential contaminant sources such as septic systems, industrial sites, or agricultural areas.
Geological Considerations: Understand the geological characteristics of the area, as certain rock formations or soil types may influence the presence of natural contaminants.
Changes in Land Use: Note any recent changes in land use around the well, as they can introduce new sources of contamination.
Choosing the Right Testing Methods
Selecting the appropriate testing methods is crucial for obtaining accurate and reliable information about the quality of your well water. Here, we’ll explore various testing methods, ranging from basic water testing kits to specialized analyses for specific contaminants.
Basic Water Testing Kits
DIY Kits
DIY water testing kits are user-friendly options that allow homeowners to conduct initial assessments of their well water quality.
Ease of Use: DIY kits typically come with straightforward instructions, making them accessible to individuals without specialized knowledge in water testing.
Common Parameters: These kits often test for basic parameters such as pH, hardness, alkalinity, and the presence of common contaminants like bacteria or nitrates.
Quick Results: DIY kits provide rapid results, allowing homeowners to obtain preliminary information about their well water quality within a short time frame.
Cost-Effective: DIY kits are generally more budget-friendly compared to professional laboratory analyses, making them a practical choice for routine monitoring.
Laboratory Analysis
For a more comprehensive evaluation of well water quality, professional laboratory analysis is the preferred choice.
Accuracy and Precision: Laboratories employ advanced equipment and trained professionals, ensuring accurate and precise results for a wide range of parameters.
Comprehensive Testing: Laboratory analyses cover a broad spectrum of contaminants, including microbiological, chemical, and mineral components, providing a thorough assessment of water quality.
Customized Packages: Laboratories offer customizable testing packages based on specific needs, allowing homeowners to tailor their analysis to address concerns or regulatory requirements.
Detection Limits: Laboratories can detect contaminants at lower concentration levels, crucial for identifying potential issues before they become significant problems.
Specialized Testing for Specific Contaminants
Bacterial Testing
Bacterial contamination is a common concern in well water, and specialized testing methods focus on identifying and quantifying bacteria.
Coliform Testing: Coliform bacteria, including E. coli, are commonly tested as indicators of fecal contamination. The presence of Coliform in well water may indicate potential health risks.
Presence/Absence Tests: These tests determine if specific pathogens are present in the water, providing insights into the safety of the water for consumption.
Quantitative Testing: Quantitative tests provide numerical data on bacterial counts, aiding in assessing the severity of contamination.
Chemical and Mineral Analysis
Specialized tests for chemicals and minerals help identify specific substances that may impact water quality.
Arsenic Testing: Given its potential health risks, arsenic testing is essential, especially in areas where geological conditions may contribute to elevated levels.
Nitrates and Nitrites: Testing for nitrates and nitrites is crucial, especially in agricultural areas, as high levels can pose health risks, particularly to infants.
Heavy Metal Analysis: Laboratories can conduct analyses for heavy metals such as lead, iron, and manganese, which can affect taste, odor, and overall water quality.
pH and Alkalinity Testing: These tests provide information about the acidity or alkalinity of the water, influencing the overall suitability for consumption and potential corrosion of plumbing fixtures.
Conducting the Well Water Test
Once you’ve chosen the right testing methods, the next crucial step is to conduct the well water test. This process involves proper sample collection, following specific techniques, and understanding the procedures for obtaining accurate results.
Sample Collection
Proper Sampling Techniques
Accurate and representative water samples are essential for obtaining reliable test results. Follow these proper sampling techniques:
Use Sterile Containers: Use clean, sterile containers specifically designed for water sampling. Rinse the containers multiple times with the well water to eliminate any residues.
Sample Depth Matters: Collect samples from the well at the depth where you typically draw water for daily use. This ensures that the sample accurately represents the water you consume.
Avoid Contamination: Take precautions to prevent contamination during sampling. Use gloves to avoid skin contact, and don’t touch the inside of the sampling container or cap.
Flush the System: Before collecting the sample, run the water for several minutes to flush out stagnant water from the pipes and the well itself.
Collect Multiple Samples: If testing for different parameters, collect separate samples for each analysis. This prevents cross-contamination and ensures the accuracy of individual results.
Sample Size Requirements
The size of the water sample is crucial for obtaining meaningful results:
Follow Testing Guidelines: Adhere to the guidelines provided by the testing kit or laboratory regarding the required sample volume. Insufficient samples may yield inaccurate results.
Consider Multiple Tests: If conducting various tests, ensure that each test receives an adequate volume of water. Some tests may require larger samples than others.
Preservation Techniques: If there’s a delay between sample collection and analysis, follow any preservation techniques recommended by the testing kit or laboratory to maintain sample integrity.
Test Procedures
Interpreting Results
Understanding and interpreting the test results correctly is crucial for making informed decisions about your well water quality:
Reference Documentation: Refer to the documentation provided with your testing kit or the laboratory report. Understand the units of measurement and what each parameter represents.
Compare to Standards: Cross-reference your results with local, state, or national water quality standards. This helps you determine if your well water meets regulatory guidelines.
Identify Red Flags: Look for any values that fall outside the acceptable ranges. Elevated levels of certain contaminants may require further investigation or remediation.
Timeframe for Results
The timeframe for receiving test results varies depending on the testing method:
DIY Kits: Results from at-home testing kits are typically available within minutes to a few days, depending on the parameters being tested.
Laboratory Analysis: Laboratory results may take longer, ranging from a few days to a few weeks, depending on the complexity of the analysis and the lab’s workload.
Plan Accordingly: Consider the turnaround time when planning your testing schedule. Factor in any delays, especially if immediate action is required based on the results.
By following proper sampling techniques, adhering to sample size requirements, and understanding the test procedures and result interpretation, you can ensure a reliable and meaningful well water test. Regular testing and careful analysis empower you to make informed decisions about the safety and quality of your well water.
Interpreting Results
Once you receive the results of your well water test, understanding the information provided is crucial for taking appropriate action.
Understanding Test Reports
Common Water Quality Parameters
Well water test reports typically include various parameters that provide insights into the overall quality of your water:
pH: pH measures the acidity or alkalinity of the water. Acceptable pH levels are generally between 6.5 and 8.5.
Total Dissolved Solids (TDS): TDS represents the concentration of dissolved substances in the water. Elevated TDS may affect taste and indicate the presence of minerals.
Hardness: Hard water contains elevated levels of calcium and magnesium, affecting soap effectiveness and potentially causing scale buildup in plumbing.
Turbidity: Turbidity measures water clarity. Higher turbidity values may indicate the presence of sediment or particles in the water.
Units of Measurement
Understanding the units used in the test report is crucial for accurate interpretation:
Concentration Units: Parameters like contaminants or minerals are often measured in parts per million (ppm) or milligrams per liter (mg/L).
Microbial Counts: Bacterial contamination may be reported as colony-forming units per milliliter (CFU/mL) or most probable number (MPN).
Comparative Analysis: Be aware of the acceptable ranges for each parameter and compare your results to these standards.
Comparing Results to Standards
Regulatory Guidelines
Cross-referencing your test results with regulatory guidelines helps assess whether your well water complies with local or national standards:
Environmental Protection Agency (EPA): The EPA sets federal standards for drinking water quality. Familiarize yourself with EPA guidelines relevant to your region.
State and Local Regulations: Some contaminants may be regulated at the state or local level. Be aware of any additional standards that apply to your area.
Health-Based Standards
Consider health-based standards to ensure your well water is safe for consumption:
Maximum Contaminant Levels (MCLs): MCLs represent the maximum allowable concentrations of specific contaminants in drinking water.
Action Levels: Some parameters have action levels rather than MCLs, indicating a concentration at which regulatory action is required.
Use Advisory Levels: These levels may trigger advisories or restrictions on water use, even if they don’t exceed MCLs.
Addressing Contamination Issues
If test results indicate contamination, it’s essential to take appropriate steps to address the issues.
Common Remediation Techniques
Filtration Systems
Activated Carbon Filters: Effective in removing organic compounds, chlorine, and some heavy metals.
Reverse Osmosis Systems: Removes a wide range of contaminants, including bacteria, viruses, and dissolved minerals.
UV Filtration: Destroys microorganisms by exposing water to ultraviolet light.
Water Treatment Options
Chlorination: Disinfects water by adding chlorine, reducing microbial contamination.
Distillation: Boils water, captures steam, and condenses it back to liquid, removing impurities.
Ion Exchange: Removes minerals responsible for water hardness by exchanging them with sodium ions.
Seeking Professional Assistance
Environmental Agencies
Local Health Departments: Contact your local health department to report contamination issues and seek guidance on appropriate actions.
Environmental Protection Agencies: State and federal agencies can provide information on regulatory compliance and offer assistance.
Certified Water Testing Companies
Consult Professionals: Certified water testing companies can conduct more detailed analyses and provide tailored recommendations for addressing specific contamination issues.
Long-Term Monitoring: These professionals can also assist in developing a long-term monitoring plan to ensure ongoing water quality.
By understanding test reports, units of measurement, and comparing results to standards, you can make informed decisions about the safety of your well water. In the case of contamination, timely action, whether through remediation techniques or seeking professional assistance, is crucial for maintaining a safe and reliable water supply.
Preventative Measures
Preventative measures are essential for maintaining the long-term quality of well water. By establishing a routine testing schedule and ensuring proper maintenance of well infrastructure, you can proactively safeguard your water supply.
Regular Testing Schedule
Frequency Recommendations
Establishing a regular testing schedule is crucial for identifying changes in well water quality over time. The frequency of testing depends on various factors:
Annual Testing: The EPA recommends annual testing for bacteria, nitrates, and other contaminants. Consider more frequent testing if your well is susceptible to specific contaminants or if you notice changes in water quality.
Seasonal Considerations: Test well water at different times of the year, especially after heavy rains or during specific seasons when agricultural activities may impact water quality.
After System Changes: Test water whenever there are changes to the well system, such as drilling a new well, replacing pipes, or making modifications to the well infrastructure.
Seasonal Considerations
Take into account seasonal variations that may affect well water quality:
Spring and Summer: Increased agricultural activities, use of fertilizers, and warmer temperatures can impact water quality. Test during these seasons to identify potential issues.
Fall and Winter: Heavy rainfall, snowmelt, and runoff can introduce contaminants into well water. Testing during these seasons is vital to assess the impact of weather-related factors.
Maintenance of Well Infrastructure
Proper Well Casing
Maintaining the integrity of the well casing is crucial for preventing contamination:
Visual Inspections: Regularly inspect the well casing for signs of damage, corrosion, or cracks. Address any issues promptly to prevent contaminants from entering the well.
Secure Well Caps: Ensure the well cap is securely in place. A properly sealed well prevents surface water, debris, and contaminants from infiltrating the well.
Keep Surroundings Clean: Maintain a clean and well-maintained area around the wellhead. Avoid storing chemicals or allowing vegetation to grow too close to the well.
Sealing Unused Wells
Unused or abandoned wells can pose a risk to groundwater quality:
Sealing Guidelines: Follow local regulations and guidelines for sealing unused wells. Improperly sealed wells can become conduits for contamination.
Professional Assistance: Seek the assistance of licensed well contractors or professionals experienced in well sealing to ensure proper closure and prevent the migration of contaminants.
Conclusion
In conclusion, maintaining the quality of well water requires a combination of proactive measures, regular testing, and diligent well infrastructure maintenance. By understanding the factors that can impact water quality and taking preventative steps, well owners can ensure a safe and reliable water supply for their households.
FAQ
How often should I test my well water?
Annual testing is recommended, but more frequent testing may be necessary based on specific circumstances, such as changes in well infrastructure or seasonal variations.
Are DIY testing kits reliable?
DIY kits can provide initial insights, but for a comprehensive evaluation, professional laboratory analysis is recommended.
What should I do if my well water tests positive for contaminants?
Consult with local health departments, environmental agencies, or certified water testing companies for guidance. Implement appropriate remediation measures based on the specific contaminants detected.
Why is sealing unused wells important?
Unused wells can serve as pathways for contamination. Proper sealing prevents the migration of contaminants into groundwater, safeguarding water quality.