Importance of Regular Cleaning
Welcome to the world of superior hydration with your trusted Brita pitcher! Beyond its role as a mere water container, the Brita pitcher stands as a symbol of purity and refreshment.
As a fellow enthusiast, I’ve discovered that the secret to unlocking the full potential of this hydration companion lies not just in its filtration system but in a commitment to regular cleaning. In this exploration, we’ll delve into the art of cleaning your Brita pitcher, turning it into a ritual that not only maintains cleanliness but elevates your water experience.
Picture this: your Brita pitcher, diligently working to deliver clean and crisp water every time you pour. Now, envision its components – the reservoir, lid, and filter compartment – as characters in a story. Regular cleaning is not just a task; it’s a dialogue with these characters, a way of expressing gratitude for the pure hydration they provide.
The importance of this ritual goes beyond appearances; it is the key to sustaining the quality of your water and ensuring that each sip remains a delightful experience.
Understanding Your Brita Pitcher
Components Overview
To embark on the journey of cleaning, let’s familiarize ourselves with the key players:
Reservoir: This is the heart of the Brita pitcher, cradling the water waiting for its transformation into a refreshing elixir.
Lid: Acting as a vigilant guardian, the lid shields your water from external elements, ensuring that every drop remains pristine.
Filter Compartment: A magical chamber where the Brita filter works its wonders, purifying your water with each passing moment.
Understanding these components is like getting to know the characters in a cherished story; it allows you to appreciate the role each plays in the grand narrative of hydration.
Common Materials Used
Now, let’s turn our attention to the materials that bring your Brita pitcher to life:
Polypropylene (PP): This robust material is commonly used in the body and various components of the pitcher, providing durability and strength.
Polyethylene (PE): Found in elements like the lid and handle, polyethylene brings flexibility and resilience to these crucial parts.
Knowing the materials used in your Brita pitcher is akin to understanding the personalities of the characters – it guides your approach to cleaning, ensuring a harmonious interaction.
Frequency of Cleaning
General Guidelines
Maintaining the pristine state of your Brita pitcher involves setting a rhythm for its cleansing ritual. While general guidelines recommend a weekly cleaning routine, it’s essential to dance to the unique beat of your lifestyle and water usage patterns.
Adjust the frequency as needed to ensure that your Brita pitcher remains a consistently reliable source of clean water.
Signs Your Pitcher Needs Cleaning
Your Brita pitcher has a language of its own, and being attuned to its subtle cues is key to its well-being. Watch out for these signs that indicate it’s time for a cleansing touch:
Changes in Water Taste: If your once-refreshing water takes on an unexpected note, it’s a gentle nudge from your pitcher for a revitalizing cleanse.
Visible Contaminants: Any particles or discoloration in your water are clear signs that your pitcher is calling for attention. It’s a visual prompt to embark on a thorough cleaning session.
Understanding the language of these signs is crucial, as it empowers you to respond promptly and ensure the continued purity of your hydration experience.
In the upcoming sections, we’ll delve into the specific steps and techniques involved in the art of cleaning your Brita pitcher. From disassembly to troubleshooting common issues, each segment of this guide is designed to enhance not only the cleanliness of your pitcher but also the joy derived from every sip of water it delivers.
Stay tuned for a comprehensive journey into the world of Brita pitcher maintenance!
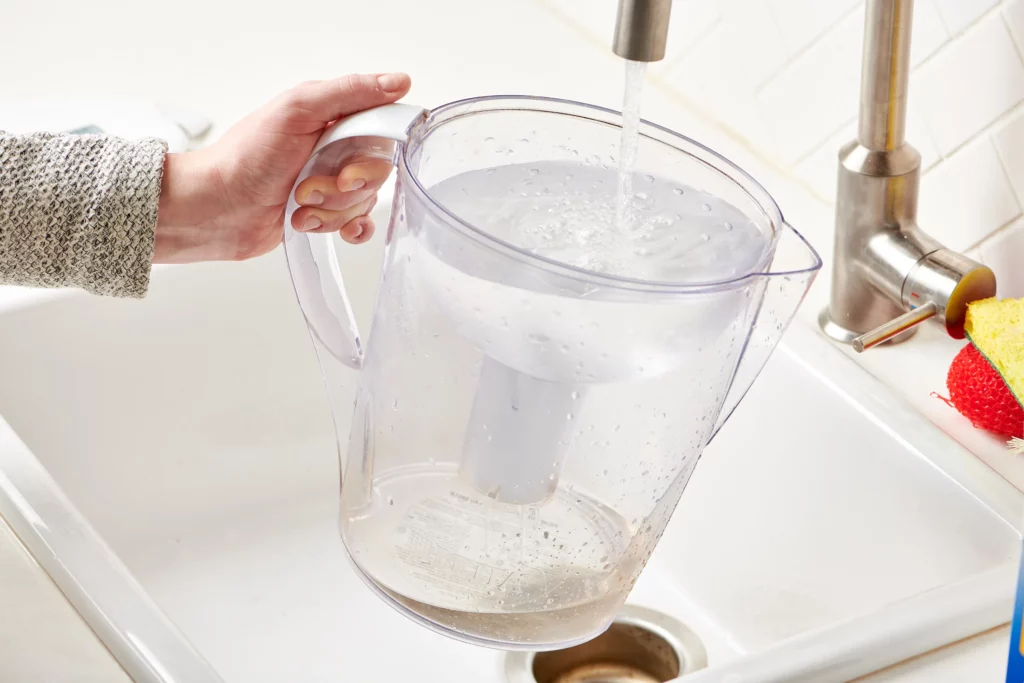
Disassembly and Pre-Cleaning Preparation
Emptying and Disassembling Components
As we embark on the journey of cleaning, the first step is to gracefully empty the reservoir. Think of it as allowing your Brita pitcher to take a refreshing exhale, preparing for the rejuvenation ahead. Following this, the disassembly process unveils the inner workings of your pitcher.
Each component – the reservoir, lid, and filter compartment – is like a character revealing its vulnerability, ready to be cared for. This step not only sets the stage for effective cleaning but fosters a deeper connection with your hydration companion.
Safe Handling of Brita Filters
The Brita filters, those silent purifiers, deserve a gentle touch during the disassembly process. Imagine cradling them like delicate treasures, acknowledging the countless water molecules they’ve transformed.
Safe handling is not just a precaution; it’s a gesture of respect for these unsung heroes, ensuring their filtration magic remains intact throughout the cleaning ritual.
Necessary Supplies
Now armed with the tools of your Brita pitcher spa day, let’s talk about the necessary supplies. A soft brush, mild detergent, and a touch of nostalgia – these are not just cleaning agents; they’re companions in the rejuvenation process. Think of them as your loyal allies, ready to assist in the mission to restore your Brita pitcher to its sparkling glory.
Basic Cleaning Steps
Handwashing vs. Dishwasher: Pros and Cons
As the cleaning ritual unfolds, a decision presents itself – handwashing or entrusting the dishwasher. It’s a choice that mirrors personal preference and history. Handwashing, akin to a personalized massage, allows you to feel every curve and crevice. On the other hand, the dishwasher offers convenience but may miss the nooks and crannies.
The pros and cons of each method are not just practical considerations; they embody a conversation between you and your Brita pitcher, allowing you to choose the approach that resonates most with your history and preferences.
Cleaning the Reservoir and Lid
With the Brita pitcher now laid bare, it’s time to focus on the reservoir and lid – the guardians of your water purity. Imagine this step as a spa session for these essential components. A soft brush, like skilled hands, works with a mild detergent to massage away impurities.
The goal isn’t just cleanliness; it’s a rejuvenation process, allowing the reservoir and lid to return to their roles as protectors of refreshing hydration.
Scrubbing Individual Components
Now, the individual components take center stage. The filter compartment, spout, and all the nooks and crannies demand their own moments of care. Here, a soft brush becomes a tool of precision, delicately scrubbing away any impurities that may have settled over time.
This isn’t just a cleaning routine; it’s a personal dialogue with each component, ensuring no nuance goes unnoticed.
Deeper Cleaning Techniques
Dealing with Stubborn Stains and Odors
Occasionally, stains and odors linger – the echoes of hydration past. Addressing them requires more than a basic cleanse; it’s a commitment to overcoming challenges. Share a personal anecdote about conquering a stubborn stain, turning this step into a narrative of triumph. This isn’t just about cleaning; it’s a celebration of resilience and persistence.
Using Baking Soda and Vinegar Solutions
In the pantry, allies await – baking soda and vinegar. These natural companions transform the cleaning routine into a sensory experience. Detail the process of creating a solution, the fizzing reaction, and the satisfaction of witnessing the Brita pitcher transform under this eco-friendly concoction.
This isn’t just about cleaning; it’s an alchemical journey, turning simple ingredients into agents of transformation.
Deep Cleaning Filters
The filters, the unsung heroes of your Brita pitcher, sometimes need more than a gentle touch. A deep cleaning session involves a careful dance of maintenance, ensuring these filters continue their noble quest.
Share a personal reflection on the resilience of your filters, turning the deep cleaning process into a tribute to these silent purifiers. This isn’t just about maintenance; it’s an acknowledgment of the vital role played by these unassuming components.
In the next segments, we’ll unravel tips for maintaining water quality, troubleshooting common issues, and exploring eco-friendly disposal methods. As we progress, remember that each step in the cleaning process is not just about functionality but about fostering a meaningful relationship with your Brita pitcher.
Stay tuned for the continuation of this immersive guide to a cleaner, tastier hydration experience!
Tips for Maintaining Water Quality
Regularly Changing Filters
Maintaining the pristine quality of your water goes beyond just cleaning; it involves a commitment to the timely changing of filters. Picture the filter as a tireless guardian, tirelessly working to purify each sip of water. Regularly changing filters, typically every two to three months, ensures that the filtration system remains efficient.
Consider your water usage patterns and the local water quality – these factors may influence the frequency. This isn’t just a task; it’s a pact with your Brita pitcher to uphold the highest standards of water quality, ensuring that each drop is as refreshing as the first.
Storing the Brita Pitcher Properly
Proper storage is the key to preserving water quality post-cleaning. Imagine the Brita pitcher as a cherished artifact, deserving of a sanctuary between hydration sessions. After the cleaning ritual, ensure thorough drying to prevent any lingering moisture, which could become a breeding ground for unwanted guests.
Store the pitcher away from direct sunlight, maintaining a cool and dry environment. This practice isn’t just about storage; it’s about extending the longevity of your Brita pitcher and preserving the freshness of each pour.
Troubleshooting Common Issues
Addressing Mold or Mildew Growth
Despite our best efforts, sometimes mold or mildew may make an unwelcome appearance. This isn’t a cause for panic; it’s an opportunity to troubleshoot. Share strategies for prevention and removal, turning the troubleshooting journey into a relatable narrative.
Proper drying between uses, regular deep cleaning with a vinegar solution, and keeping an eye on hidden areas are effective preventive measures. In case mold or mildew does appear, assure your readers that a thorough cleaning session, possibly with a mild bleach solution, can restore the Brita pitcher to its pristine state. This isn’t just about addressing an issue; it’s about turning challenges into triumphs.
Handling Brita Pitcher Leaks
A leaky pitcher can be a frustrating hiccup in your hydration routine, but it’s not a sign of defeat. Share troubleshooting tactics for handling leaks, turning a potential nuisance into a manageable challenge. Inspect the components for any visible damage, ensure proper assembly, and double-check the tightness of the filter.
Encourage readers to view these troubleshooting moments as opportunities to understand their Brita pitcher better. This isn’t just about fixing a leak; it’s about empowering users to be hands-on custodians of their hydration experience.
Hygiene and Safety Practices
Importance of Hand Hygiene
Hand hygiene is not just a general practice; it’s a cornerstone of maintaining water purity. Share personal rituals or precautions taken to ensure impeccable hand hygiene during cleaning routines.
Whether it’s using hand sanitizer or thoroughly washing hands before handling components, emphasize the direct impact of these practices on the cleanliness of your Brita pitcher. This isn’t just about hygiene; it’s about recognizing the pivotal role hands play in preserving the purity of your water.
Avoiding Harmful Cleaning Agents
Choosing safe cleaning agents is crucial. Share insights into your preferred safe cleaning agents, emphasizing their effectiveness in maintaining hygiene and longevity. This isn’t just about cleaning agents; it’s about making informed choices that align with your commitment to water quality.
Whether it’s opting for mild detergents or natural solutions, each choice contributes to a safer and more enjoyable hydration experience.
Eco-Friendly Disposal and Recycling
Responsible Disposal of Filters
Filters, having completed their noble duty of purifying countless gallons of water, eventually reach the end of their lifespan. Responsible disposal is a crucial aspect of maintaining a sustainable relationship with your Brita pitcher.
Share insights into proper disposal methods, guiding users on how to collect used filters for recycling. Many regions offer specific recycling programs for Brita filters, and participating in these programs ensures that the materials are repurposed responsibly.
This step isn’t just about discarding filters; it’s an opportunity to contribute to a circular economy, reducing the environmental footprint of your hydration routine.
Recycling Brita Pitcher Components
As the lifecycle of your Brita pitcher evolves, so does the responsibility of its disposal. Guide users on how to dismantle the various components – the body, lid, and filter compartment – for proper recycling. Highlight the recyclability of materials like polypropylene (PP) and polyethylene (PE).
Encourage users to check local recycling guidelines, ensuring that each component is disposed of in an environmentally responsible manner. This isn’t just about parting ways with an old pitcher; it’s about making a conscious choice to minimize waste and contribute to a healthier planet.
Conclusion
As we conclude our comprehensive guide to cleaning and maintaining a Brita pitcher, let’s reflect on the journey. Cleaning and learning how to use your Brita pitcher isn’t just a routine; it’s a commitment to purity, sustainability, and a holistic approach to hydration.
Each step, from disassembly to troubleshooting, is an opportunity to deepen your connection with this hydration companion. The Brita pitcher isn’t merely an appliance; it’s a vessel of nourishment, a guardian of water quality, and a partner in your daily rituals.
Remember, the journey doesn’t end with cleanliness; it extends to responsible disposal and recycling. By adopting eco-friendly practices, you not only preserve water purity but also contribute to a greener, more sustainable world. As you bid farewell to old filters and components, envision the positive impact of your choices, creating a ripple effect that goes beyond your kitchen sink.
In the grand symphony of hydration, your Brita pitcher plays a significant role. It’s not just about the water it holds; it’s about the moments it witnesses – the sips of refreshing clarity, the conversations it silently hears, and the sustainable choices it inspires. So, here’s to your Brita pitcher – a loyal companion on your journey to optimal hydration.
FAQ
How often should I change Brita filters?
Generally, every two to three months, but usage patterns and water quality may influence the frequency.
Can I clean the Brita pitcher in the dishwasher?
While some components are dishwasher-safe, handwashing ensures meticulous cleaning, reaching every nook and cranny.
What should I do if my Brita pitcher develops a strange taste?
Perform a thorough cleaning and consider replacing the filter. Check for signs of mold or mildew, especially in hidden areas.
How can I prevent mold or mildew growth in my Brita pitcher?
Ensure thorough drying between uses and regular deep cleaning with a vinegar solution. Proper storage away from moisture is essential.
Can I recycle Brita filters?
Brita has a filter recycling program in some regions. Collect used filters and participate in this program for a sustainable disposal option.